online retailer,bulk & wholesale and OEM/ODM e-shop of motor and controller, Shenzhen weigena technology co., LTD")


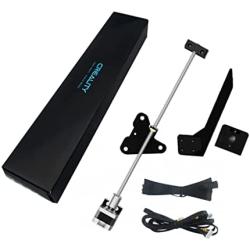
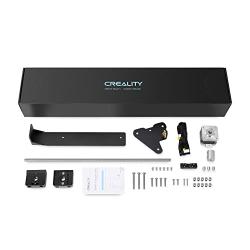
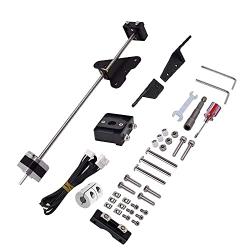
G-Hubble Ender 3 Dual Z Axis Upgrade Kit with Lead Screw Stepper Motor, 3D Printer Accessories Parts for Creality Ender 3/Ender 3 Pro/Ender 3 V2/Voxelab Aquila
Availability: Pre-Order, Inquiry Price
About this product
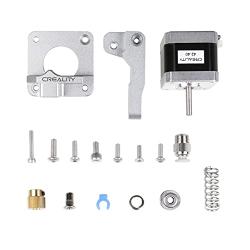
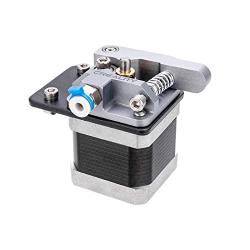
*Simple Assemble: No welding, No modification, No need other tools, Easy to install.
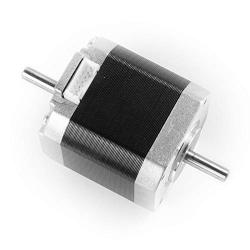
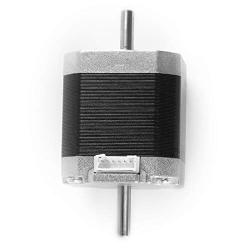
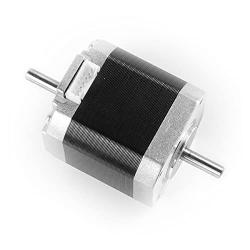
*High Quality: with All-aluminum coupling and a stepper motor, Double Z structure runs smoothly.
*Mature Solution: The dual z axis upgrade kit is compatible with Ender 3/ Ender 3 Pro/ Ender 3 V2/ 3D printer.Easily improve 3D printers with low cost efficiency to Dual Z axis mode.
*Cost Effective: Minimal cost upgrade and maximum optimization
*G-Hubble Promise: Tested before leaving the factory,
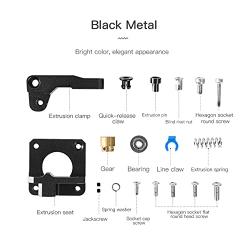
Description
Feature:
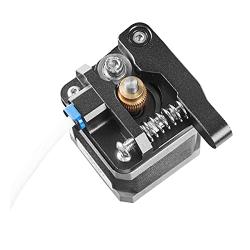
-The dual Z-axis upgrade kit is an excellent system that can provide you with a perfect solution to prevent the X rack from shaking. The kit contains the stepper motor, which can ensure stable operation and smooth movement, which greatly improves the accuracy of the 3D printer.
-Due to the dual Z-axis update, the X-axis rises steadily and runs smoothly, which completely avoids the stacking of the underlying consumables, reduces the layer pattern caused by the Z-axis vibration, and greatly reduces the difficulty and frequency of leveling.
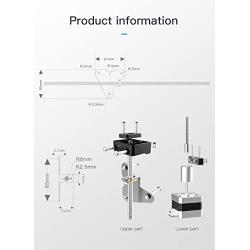
Installation Notes:
1) Turn off the printer, unplug the power cord, and then use a hex wrench to remove the two screws that fix the power supply to remove the power supply.
2)Â Install the coupler on the stepper motor and tighten the screws. Use hexagon socket screws and Z AxisMotor bracket to fix the motor on the aluminum profile.
3)Â Remove all the screws of the sheet metal pulley on the right side of the X axis.
4) Fix the Z-axis sheet metal with long screws, and then install it on the X-axis right sheet metal. Screw the T8 screw into the nut of the coupler, and then tighten the screw of the coupler.
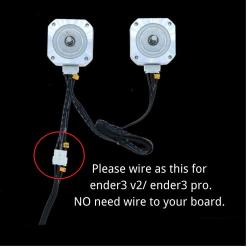
5) Install the Dual-Z stepper cable to the main board and connect two Z motors.
6) Install the Phillips screw and fixing nut on the power supply bracket, and then continue to install the power supply.
7) Place the lead screw bearing guide on the left and right sides of the X-axis aluminum profile, and raise the Z-axis to the highest position. If one side is not level, turn the corresponding coupler clockwise.
8) Install the lead screw bearing guide and tighten the screws, paying attention to the alignment position of the mounting base.
Frequency Asked Questions
What is motormaker.net?
MotorMaker.net is an online retailer and bulk order e-shop for electric motor and controller products, range from standard products and customized products. Main production bases are located in Shenzhen, Dongguan, Wuhan, Shanghai and Chengdu. A professional team supports your order and customization design.
What service can be supported from motormaker.net?
MotorMaker.net offer product order and product customization service. All orders will be supported after-sales service, including quanlity gurantee, and technical support.
How to order products from motormaker.net?
You can online order product from motormaker.net by adding product to cart and got to checkout page. Multiple currency options are supported. You can choose suitable currency to place order. Before checkout, you should register account to submit order information.
How to delivery your order from motormaker.net to you?
For order delivery, motormaker.net provides three shipping options, express, air-flight and sea freight. You can choose one option according to your order.
How to inquiry product bulk price?
For the interested product, you can submit bulk price inquiry by bulk order inquiry form.
Related Products