online retailer,bulk & wholesale and OEM/ODM e-shop of motor and controller, Shenzhen weigena technology co., LTD")


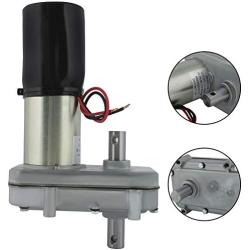
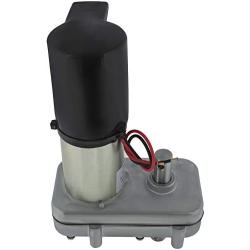
WonVon RV Power Gear 14-1130 Slide Out Relay Control Board Fit for Fleetwood 246063
Availability: Pre-Order, Inquiry Price
About this product
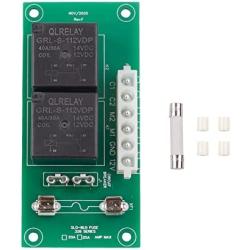
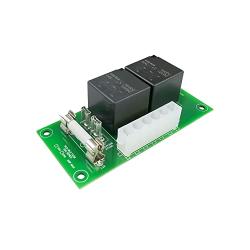
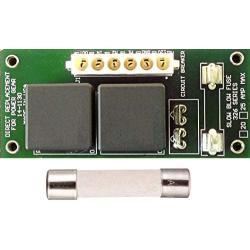
*This is a replacement board for the Power Gear Slide-Out Controller 14-1130 and 140-1130 Relay Boards with high power relays that deliver power to the Power Gears motor slide-out system.
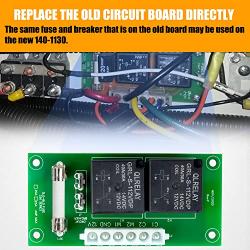
*This board replaces models 14-1130, 14-1098, 14-1086. Fuses and circuit breakers from the old board can be used on the new 140-1130. The controller requires a centerline of 12VDC on the wall switch (positive trigger) and ground trigger on some models of controllers (eg 14-1098).
*If you have an older Power Gear 14-1098 board on your RV, this will not be a replacement. Its slightly bigger (so youll need to have new holes to screw it in) and youll also have to make some changes to your stock wiring. This will work fine for your system if you make changes.
*Easy installation just remove the thermal breaker and glass fuse from the old board.
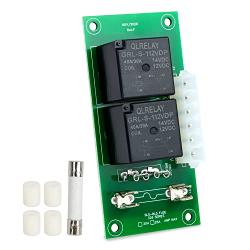
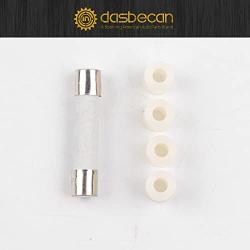
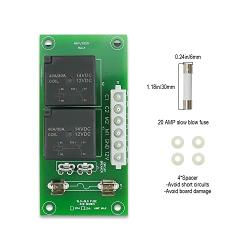
*Package Includes: 1 X Power Gear 14-1130 or 140-1130 Slide out relay;4 X Spacers for the bottom of board(to avoid short circuit); 1 X slow blow fuse 20 AMP.
Description
REPLACEMENT INSTRUCTIONS FROM 14-1098(OLD RELAY TO 14-1130(NEW RELAY).
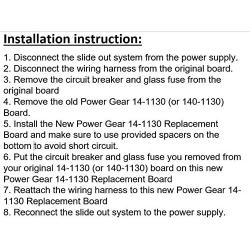
Installation guide:
1. Disconnect the slide-out system from the power source.
2. Disconnect the wiring harness from the original circuit board.
3. Remove the circuit breaker and glass fuse on the original board
4. Remove the old Power Gear 14-1130 (or 140-1130) board.
5. Install the new Power Gear 14-1130 replacement board, be sure to use the spacers provided at the bottom to avoid short circuits.
6. Take the circuit breaker and glass fuse from your original 14-1130 (or 140-1130) board to this new power gear 14-1130 replacement board
7. Reconnect the harness to this new power gear 141130 replacement board
8. Reconnect the slide-out system to pow
1. Locate and disconnect the batteries and any power source to the unit.
2. Refer to ornginal manufacturer service department for location of the slideout relay control module.
3. Remove the 6-pin harness from the relay control by squeezing together the top of the plastic tabs on each side and pulling up from the control.
4. Remove the mounting screvws and the old contrl. Reference the circuit breaker amperage for proper control replacement.
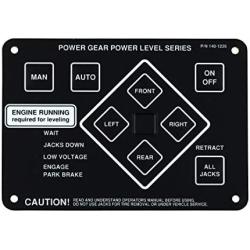
5. Locate and move the center wire on the slide-out switch from ground to 12 VDC source through a 3 amp (preferred) fast acting standard automotive fuse. See drawing below.
5. Remount the replacement control and reconnect the 6-pin connector to the control module.
Note: The wire hamess connector is directional and may need rotating 180 for proper mating.
7. Reconnect batteries and/or power sources then test slideout operation.
Note: For fuse installs or replacement, use Slo-Blo fuse only of the same amp rating as the circuit breaker.
Package Contents:
1PCS X 14-1130
1PCS X Slow blow fuse 20 AMP
Package Including
Package Contents:
1PCS X 14-1130
1PCS X Slow blow fuse 20 AMP
Frequency Asked Questions
What is motormaker.net?
MotorMaker.net is an online retailer and bulk order e-shop for electric motor and controller products, range from standard products and customized products. Main production bases are located in Shenzhen, Dongguan, Wuhan, Shanghai and Chengdu. A professional team supports your order and customization design.
What service can be supported from motormaker.net?
MotorMaker.net offer product order and product customization service. All orders will be supported after-sales service, including quanlity gurantee, and technical support.
How to order products from motormaker.net?
You can online order product from motormaker.net by adding product to cart and got to checkout page. Multiple currency options are supported. You can choose suitable currency to place order. Before checkout, you should register account to submit order information.
How to delivery your order from motormaker.net to you?
For order delivery, motormaker.net provides three shipping options, express, air-flight and sea freight. You can choose one option according to your order.
How to inquiry product bulk price?
For the interested product, you can submit bulk price inquiry by bulk order inquiry form.
Related Products