online retailer,bulk & wholesale and OEM/ODM e-shop of motor and controller, Shenzhen weigena technology co., LTD")


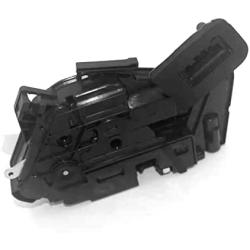
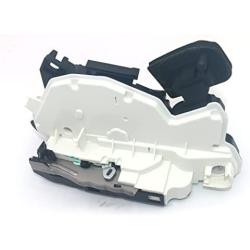
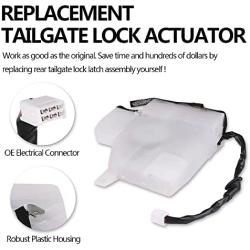
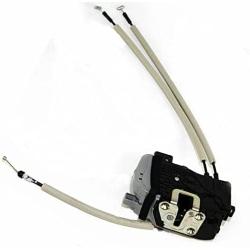
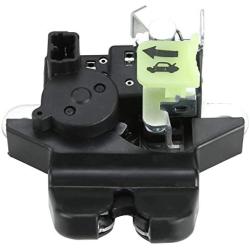
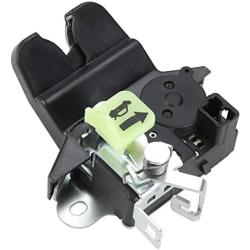
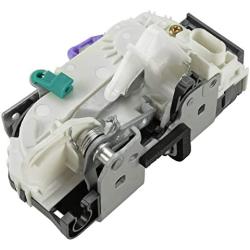
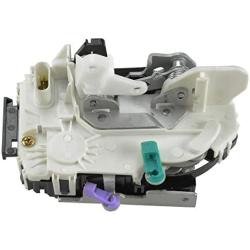
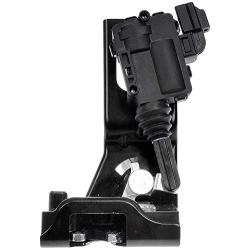
Rear Hatch Liftgate Trunk Door Lock Actuator Motor For VW Golf GTI 6 MK6 MKVI 72061
About this product
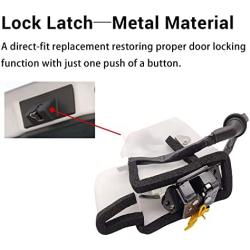
*Direct replacement for a proper fit every time
*High quality electric motor
*Durable construction
*Vehicle try-on testing has been conducted on this part to ensure trouble-free performance
Description
Parts Port is the place where to find the high quality aftermarket auto parts with low cost. All our products are designed to meet or exceed OE performance providing today's technician with the quality parts needed to get the job done right.
Parts Port is the place where to find the high quality aftermarket auto parts with low cost. All our products are designed to meet or exceed OE performance providing today's technician with the quality parts needed to get the job done right.
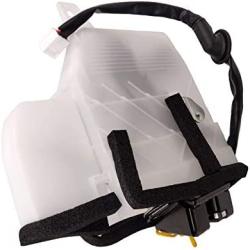
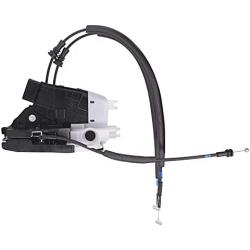
Tailgate / Trunk.
How to Replace Door Lock Actuators
Important Tips: There are several steps and quite a few parts involved in this project. It might be a good ideal to take your phone or camera and take pictures during each step of disassembly, so you can be sure everything comes back together again properly during the repair/replacement phase. Remember that taking things apart is always a lot easier than putting them back together again!
Important Tips: There are several steps and quite a few parts involved in this project. It might be a good ideal to take your phone or camera and take pictures during each step of disassembly, so you can be sure everything comes back together again properly during the repair/replacement phase. Remember that taking things apart is always a lot easier than putting them back together again!Direct replacement for a proper fit every timeHigh quality electric motorDurable constructionVehicle try-on testing has been conducted on this part to ensure trouble-free performance5K0827505A9B95K0 827 505 A 9B9CHRYSLER GRAND VOYAGER 2001-2002CHRYSLER TOWN & COUNTRY 2001-2007CHRYSLER VOYAGER 2001-2007DODGE CARAVAN 2001-2007DODGE GRAND CARAVAN 2001-2007With the windows rolled up, disconnect the battery. Plug a battery saver into your cigarette lighter. This will keep your computer live and keep your vehicle settings current. If you do not have a nine-volt battery saver, though, thatÂ’s okay.Remove interior door trim. Depending on what you drive, you may need a door-panel-pulling tool thats specific to your vehicle; be very gentle because you dont want to break any connectors or end up with any missing parts or a rattle after the jobs completed.Start at the inner door handle bezel and look for bolts or screws holding the trim to the door frame. Another common location for bolts and screws is in the bottom of cup holders and door handle pulls, behind mirror or speaker trim plates, and the bottom edge of the door trim.Use a trim tool or thin screwdriver to pry the switch plate (where the electric window and lock buttons are located) up and away from the door panel. Disconnect the wiring.Next, pry the door trim off the frame, starting at the bottom. The door clips need some encouragement, but will pop off. Easy with the screwdriver, as it can easily break the plastic clips (replacements are available). You may find that a special forked tool is what you need for this step; entire door-panel tool kits are available, with just about everything you need for the job. Continue down the length of the door, removing clips as you go.Grasp the bottom of the plastic door trim with both hands and pull towards you, then lift. The door trim should slide up and off the frame. Unclip any wiring for interior lighting or power mirrors at this time. Set the door trim aside somewhere out of the way.Remove the plastic water shield by pulling on a corner and slowly working it off. Do your best to keep it in one piece, as this moisture barrier can be fragile and will need to be reused.Some models feature an additional metal door access plate, protecting the internal components. Remove the bolts and set it aside.Locate the lock actuator. It is bolted to the inside of the door frame by the door latch. Remove the electrical plug that supplies power to the actuator. It should come out by hand.Remove the three or four torx head bolts securing the actuator to the door frame. The actuator will be loose in the door frame, supported by two metal rods running to the exterior and interior door handles. The rods should slide out of the actuator with no tools, but take note of which rod goes into the different sections of the actuator. Then pull the actuator free of the door. Check the electrical connector for the actuator carefully for signs of corrosion or damage.Assembly is the reverse order. Start by sliding the new actuator into the door panel, orienting it so you can insert the lock rods. Set the actuator in place and bolt down tightly with the torx bolts.
Frequency Asked Questions
What is motormaker.net?
MotorMaker.net is an online retailer and bulk order e-shop for electric motor and controller products, range from standard products and customized products. Main production bases are located in Shenzhen, Dongguan, Wuhan, Shanghai and Chengdu. A professional team supports your order and customization design.
What service can be supported from motormaker.net?
MotorMaker.net offer product order and product customization service. All orders will be supported after-sales service, including quanlity gurantee, and technical support.
How to order products from motormaker.net?
You can online order product from motormaker.net by adding product to cart and got to checkout page. Multiple currency options are supported. You can choose suitable currency to place order. Before checkout, you should register account to submit order information.
How to delivery your order from motormaker.net to you?
For order delivery, motormaker.net provides three shipping options, express, air-flight and sea freight. You can choose one option according to your order.
How to inquiry product bulk price?
For the interested product, you can submit bulk price inquiry by bulk order inquiry form.
Related Products